Table of Contents
Creating a dataset for fingerprinting
The objective of this tutorial is to create a non biased dataset for transmitter identification. By fixing the reciever on a robot, the distance and the canal is constantly and randomly changing, forcing the deep learning process to learn on the RF fingerprints. This tutorial explains how to use FIT/Cortexlab to create this dataset.
Requirement : An access to the CortexLab to start the robot.
Create your docker image
With docker, we will enable the nodes to use Gnuradio 3.7. The codes used are written in this version (waiting for an update). In order to do that, we will create an image containing theGnuradio 3.7 version and the python/C++ files used for the dataset creation.
First you have to get the python codes used. Download the following folder :
https://github.com/Inria-Maracas/gr-txid
Then, let us create a dockerfile in your home, giving the files instructions we want to use :
FROM m1mbert/cxlb-gnuradio-3.7:1.0

WORKDIR /root

COPY ./<python_folder_name> /root

RUN chmod -R 777 ./<python_subfolder_name>
In this dockerfile, the first line download the 3.7 Gnuradio version. Then it adds the python files used for the dataset creation and finally it gives the execution rights to the folder.
Before building the image, take the node list used by the code which is in the scheduler.py file. This node list will be used in the scenario.
We can now build our image and then access into it with an ssh command :
you@yourpc:~$ docker build -t <nameofimage>
you@yourpc:~$ docker run -d -p 2222:2222 <nameofimage>
you@yourpc:~$ ssh -Xp 2222 root@localhost
Then let us compile the C++ code in the container. Go inside the first folder having the Cmake. file and launch the compilation :
root@containerID:~$ cmake .
root@containerID:~$ make
root@containerID:~$ make install
The following lines might be necessary in case of unfound file error :
root@containerID:~$ mv /<locationofthisfolder>/examples/src/tmp/home/cxlbuser/tasks/task/* /<locationofthisfolder>/examples/src/
root@containerID:~$ rm -rf /<locationofthisfolder>/examples/src/tmp
To finish the config, execute :
root@containerID:~$ ldconfig
To be sure the config has been done properly, you can launch the emitter or recevier command (used then to create the dataset).
root@containerID:~$ ./gr_txid/examples/src/emitter.py -T 0 -P 3580 -G 8 -R 0 -f 2
At this point the only message error should be this one : empty devices services. Meaning that there is no USRP available on your laptop.
The image is ready to be used, we have now to push it on Dockerhub. The nodes will have access to it through internet. (you first need to create a docker account)
you@yourpc:~$ docker ps -a
you@yourpc:~$ docker commit [CONTAINER ID] [NEW IMAGE NAME]
you@yourpc:~$ docker tag [NEW IMAGE NAME] [DOCKER USERNAME]/[NEW IMAGE NAME]
you@yourpc:~$ docker login
you@yourpc:~$ docker push [DOCKER USERNAME]/[NEW IMAGE NAME]
You can check your pushed image on internet, on dockerhub website.
Create your airlock scenario
We have now to create the scenario read by minus on the airlock. Create a .sh file and a .yaml file inside a folder (cortexbot). The .sh file will execute the commands submitting the task with minus. The .yaml file is the scenario you will modifie to create your experiments.
The file tree should look like that:
...
├── cortexbot
│   ├── generate.sh
│   ├── my_task
        ├──scenario.yaml
...
The bash file for the execution :
#!/bin/bash

# Creating the task

echo "Tasks creation and submission"
echo "Reading scenario my_task"
echo "Creating my_task.task"

minus task create my_task

echo "Submiting my_task.task"

minus task submit my_task.task

# Delete node folders and tasks

rm -rf my_task.task

echo "Wait for tasks to finish"

loop=True
value=$(minus testbed status | grep "(none)" | wc -l)
while [ $loop = 'True' ]
do
	if [ $value = '1' ]
	then loop=False
	else sleep 10 && echo "."
	fi
	value=$(minus testbed status | grep "(none)" | wc -l)
done

echo "Tasks finished"
And the scenario file :
description: Base scenario for TXid dataset generation

duration: 3600

#list of scheduler nodes= = [3, 4, 6, 7, 8, 9, 13, 14, 16, 17, 18, 23, 24, 25, 27, 28, 32, 33, 34, 35, 37]

nodes:

#scheduler node

  node5:
    container:
      - image: <[DOCKER USERNAME]/[NEW IMAGE NAME]>:latest
        command: bash -lc "python /root/gr-txid-master/examples/src/scheduler.py "

#emitter nodes corresponding to the scheduler list

  node3:
    container:
      - image: thomasbeligne/cortexbot2:latest
        command: bash -lc "/root/gr-txid-master/examples/src/emitter.py -T 0 -P 3580 -G 8 -R 0 -f 0"

  node4:
    container:
      - image: thomasbeligne/cortexbot2:latest
        command: bash -lc "/root/gr-txid-master/examples/src/emitter.py -T 1 -P 3580 -G 8 -R 0 -f 0"

  node6:
    container:
      - image: thomasbeligne/cortexbot2:latest
        command: bash -lc "/root/gr-txid-master/examples/src/emitter.py -T 2 -P 3580 -G 8 -R 0 -f 0"

  node7:
    container:
      - image: thomasbeligne/cortexbot2:latest
        command: bash -lc "/root/gr-txid-master/examples/src/emitter.py -T 3 -P 3580 -G 8 -R 0 -f 0"


#add as many nodes you want to use
You can add as many nodes as you want, but be sure they are in the scheduler list on your image docker. In your scenario you also have to check the transmitter identification “-T <value>”. The value has to correspond to the rank of the nodes in the scheduler list.
Once you have created this folder, send it to airlock and connect to it using ssh : :
you@yourpc:~$ scp -P 2269 -v -r /home/username/task1/gr_txid username@gw.cortexlab.fr:/cortexlab/homes/username/workspace/
you@yourpc:~$ ssh -X -v username@gw.cortexlab.fr
Once your connected, give the rights to the bash file and book the testbed :
you@srvairlock:~$ chmod +x ~/workspace/cortexbot/generateData.sh
you@srvairlock:~$ oarsub -l nodes=BEST,walltime=2:00:00 -r '2022-10-11 09:00:00'
The airlock config is now done. Let's now prepare the Turtlebot
Config the Turtlebot
Setup
Before the experiement, charge the TurtleBot at least one hour prior. (To avoid overcharging and damaging the battery it is not recommended to charge overnight).
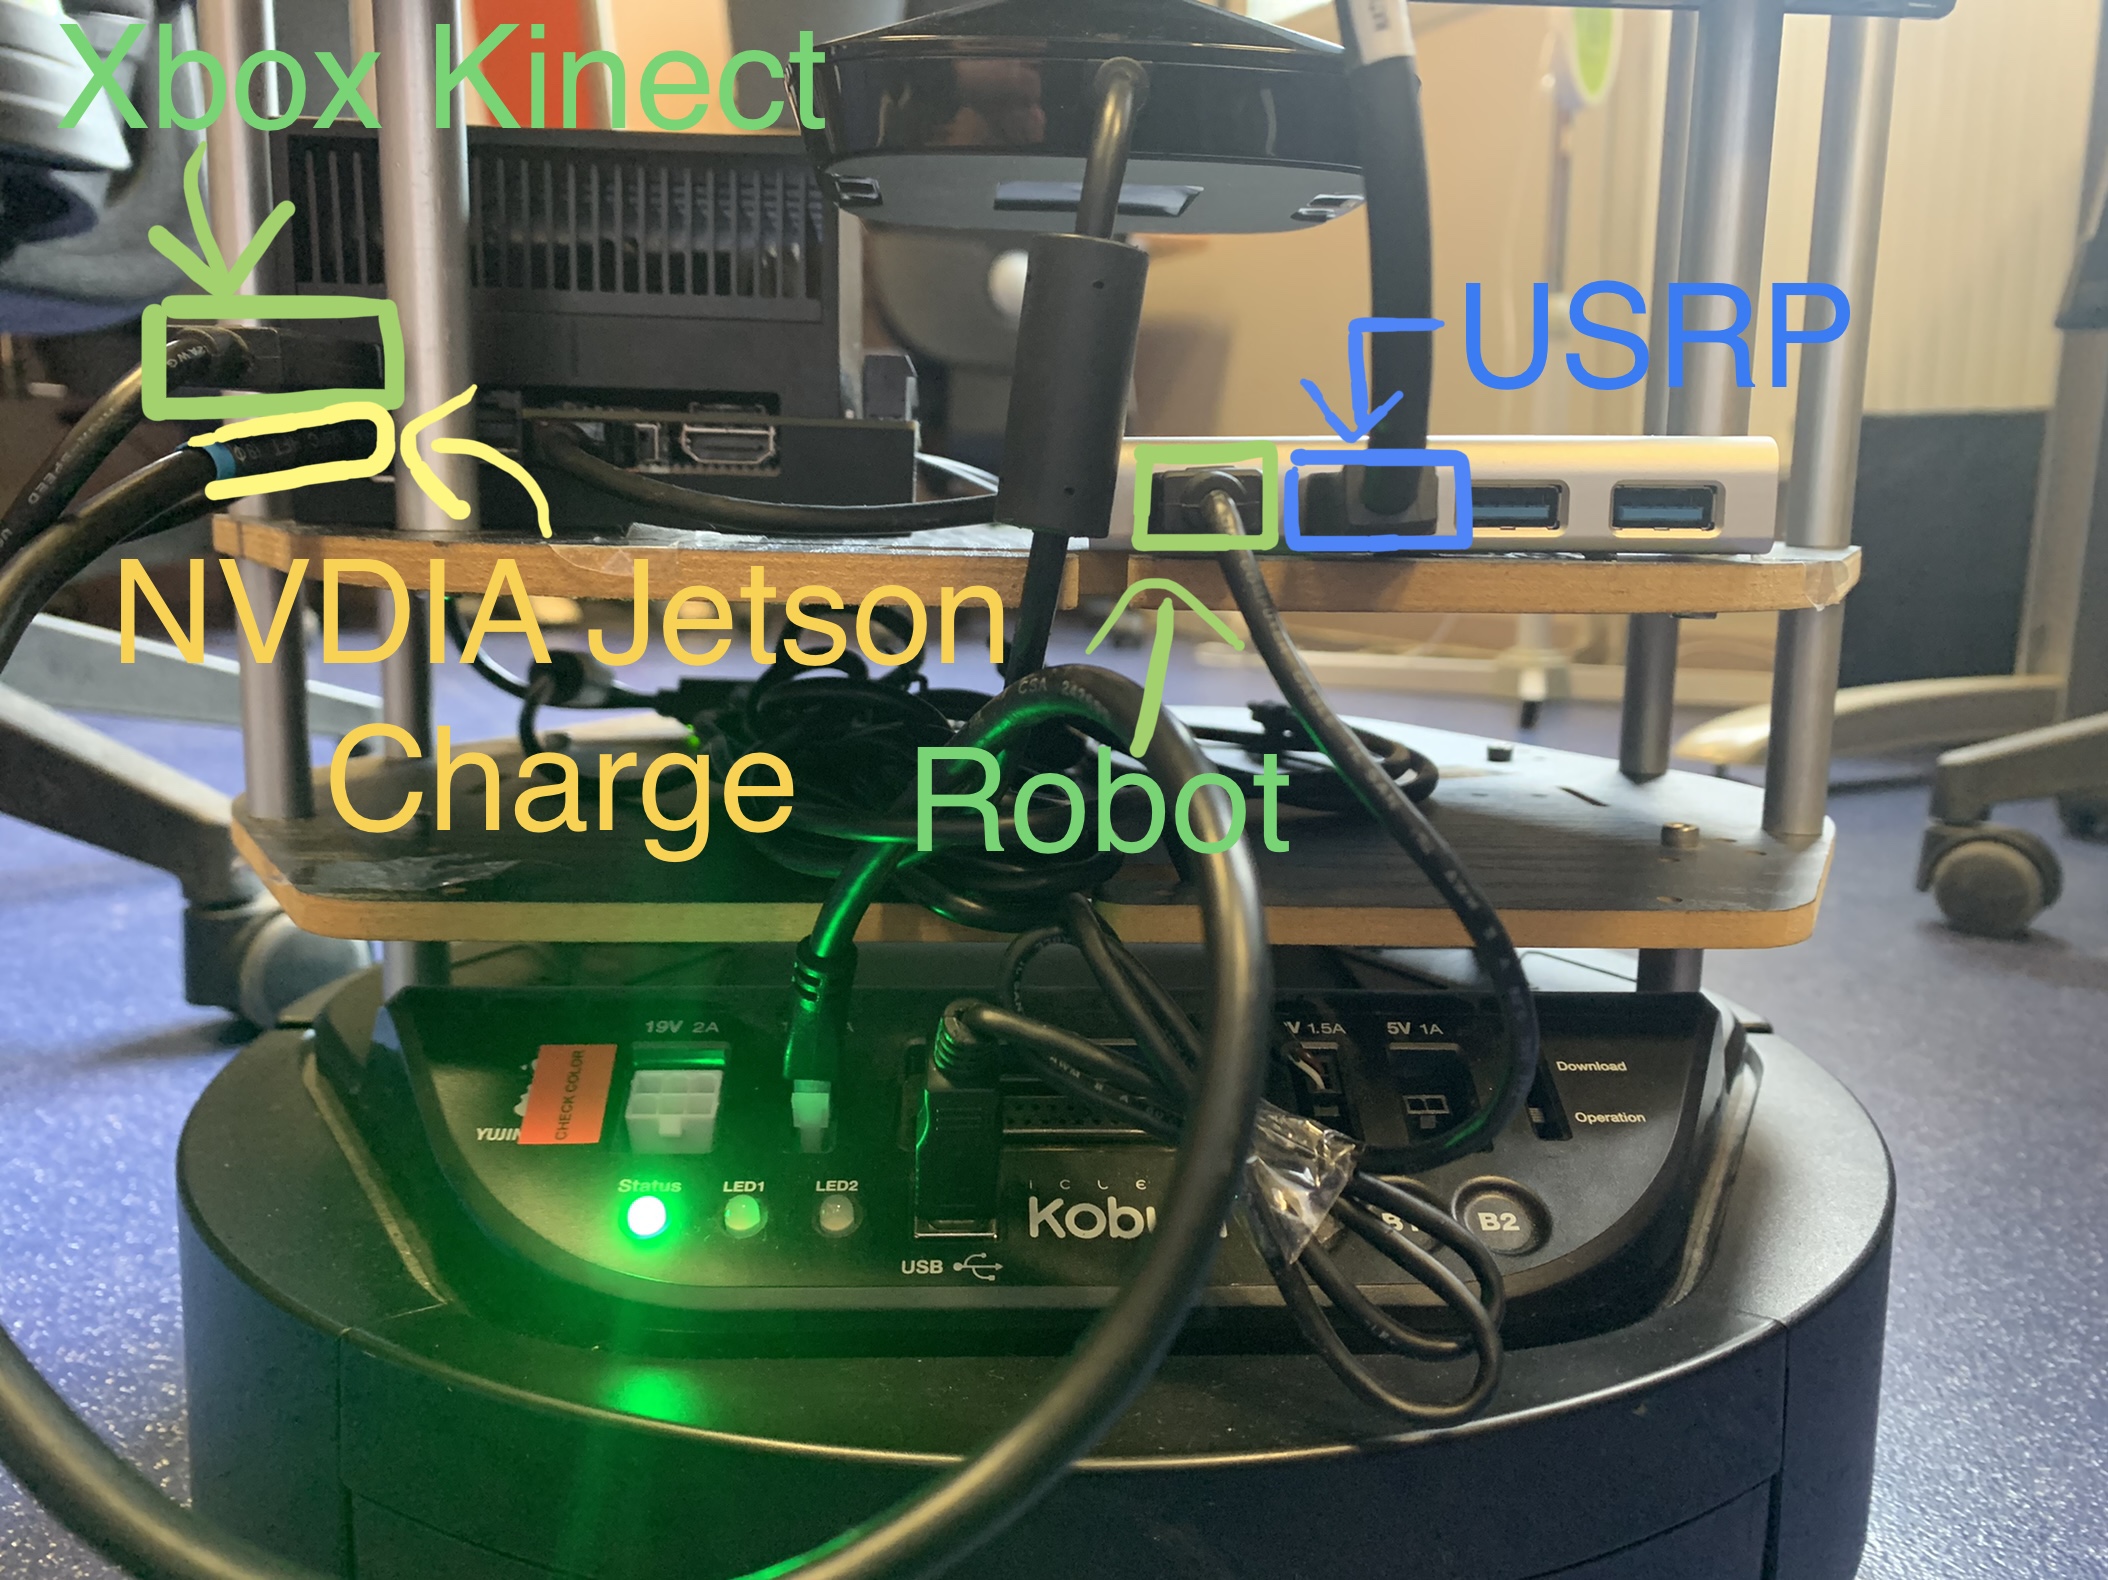
Our TurtleBot is wired up in the following way :
We use a NVDIA Jetson to run the movement program and reception code :
Switching on the TurtleBot
Switch on the base of the robot. (the green “Status” LED should be turned on, and not flash, nor be yellow. In that case the robot hasn't got enough battery.)
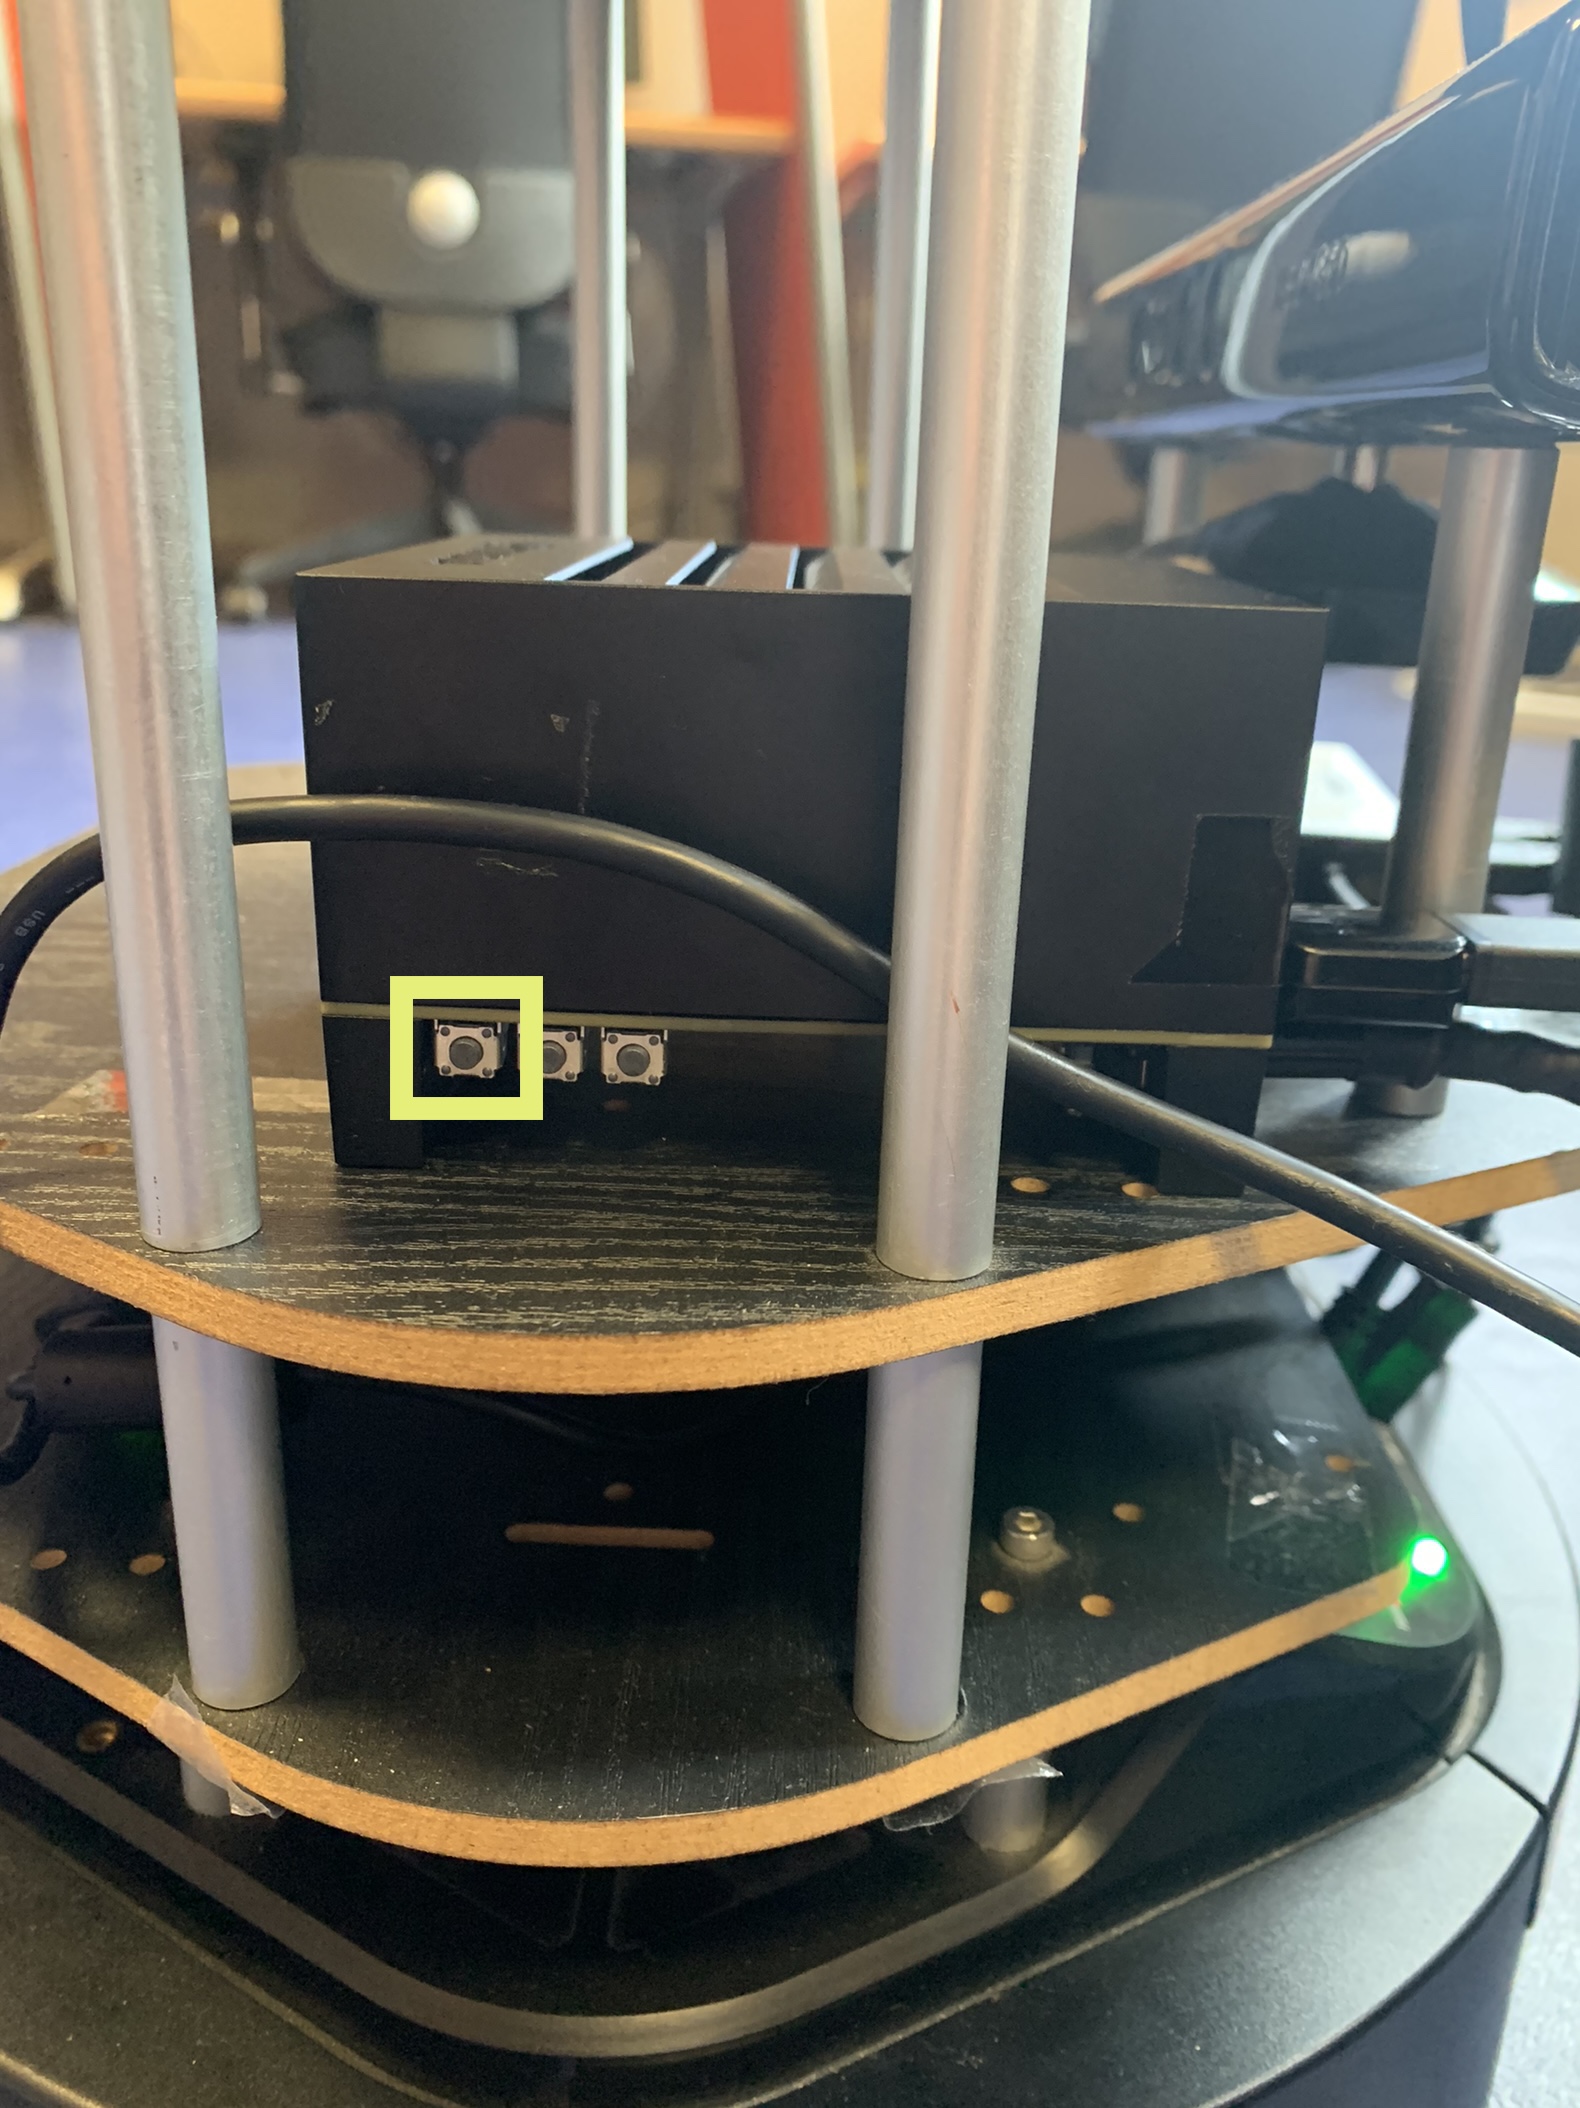
To turn the computor on press the furthest button to the left, on the side of the computor : (if turned on correctly a flat white LED should be on)
Launching the programs
Plug in the computor to a monitor through an HDMI capble and plug in a keyboard and mouse.
Login to the computor with the user : CorteXbot and the password : cxlbusr.
Transfer the first part python codes folder in the robot computer. To run the reciever code (from gr-txid) enter into the terminal :
.<file_path>/reciever.py -R re_00 -I im_00
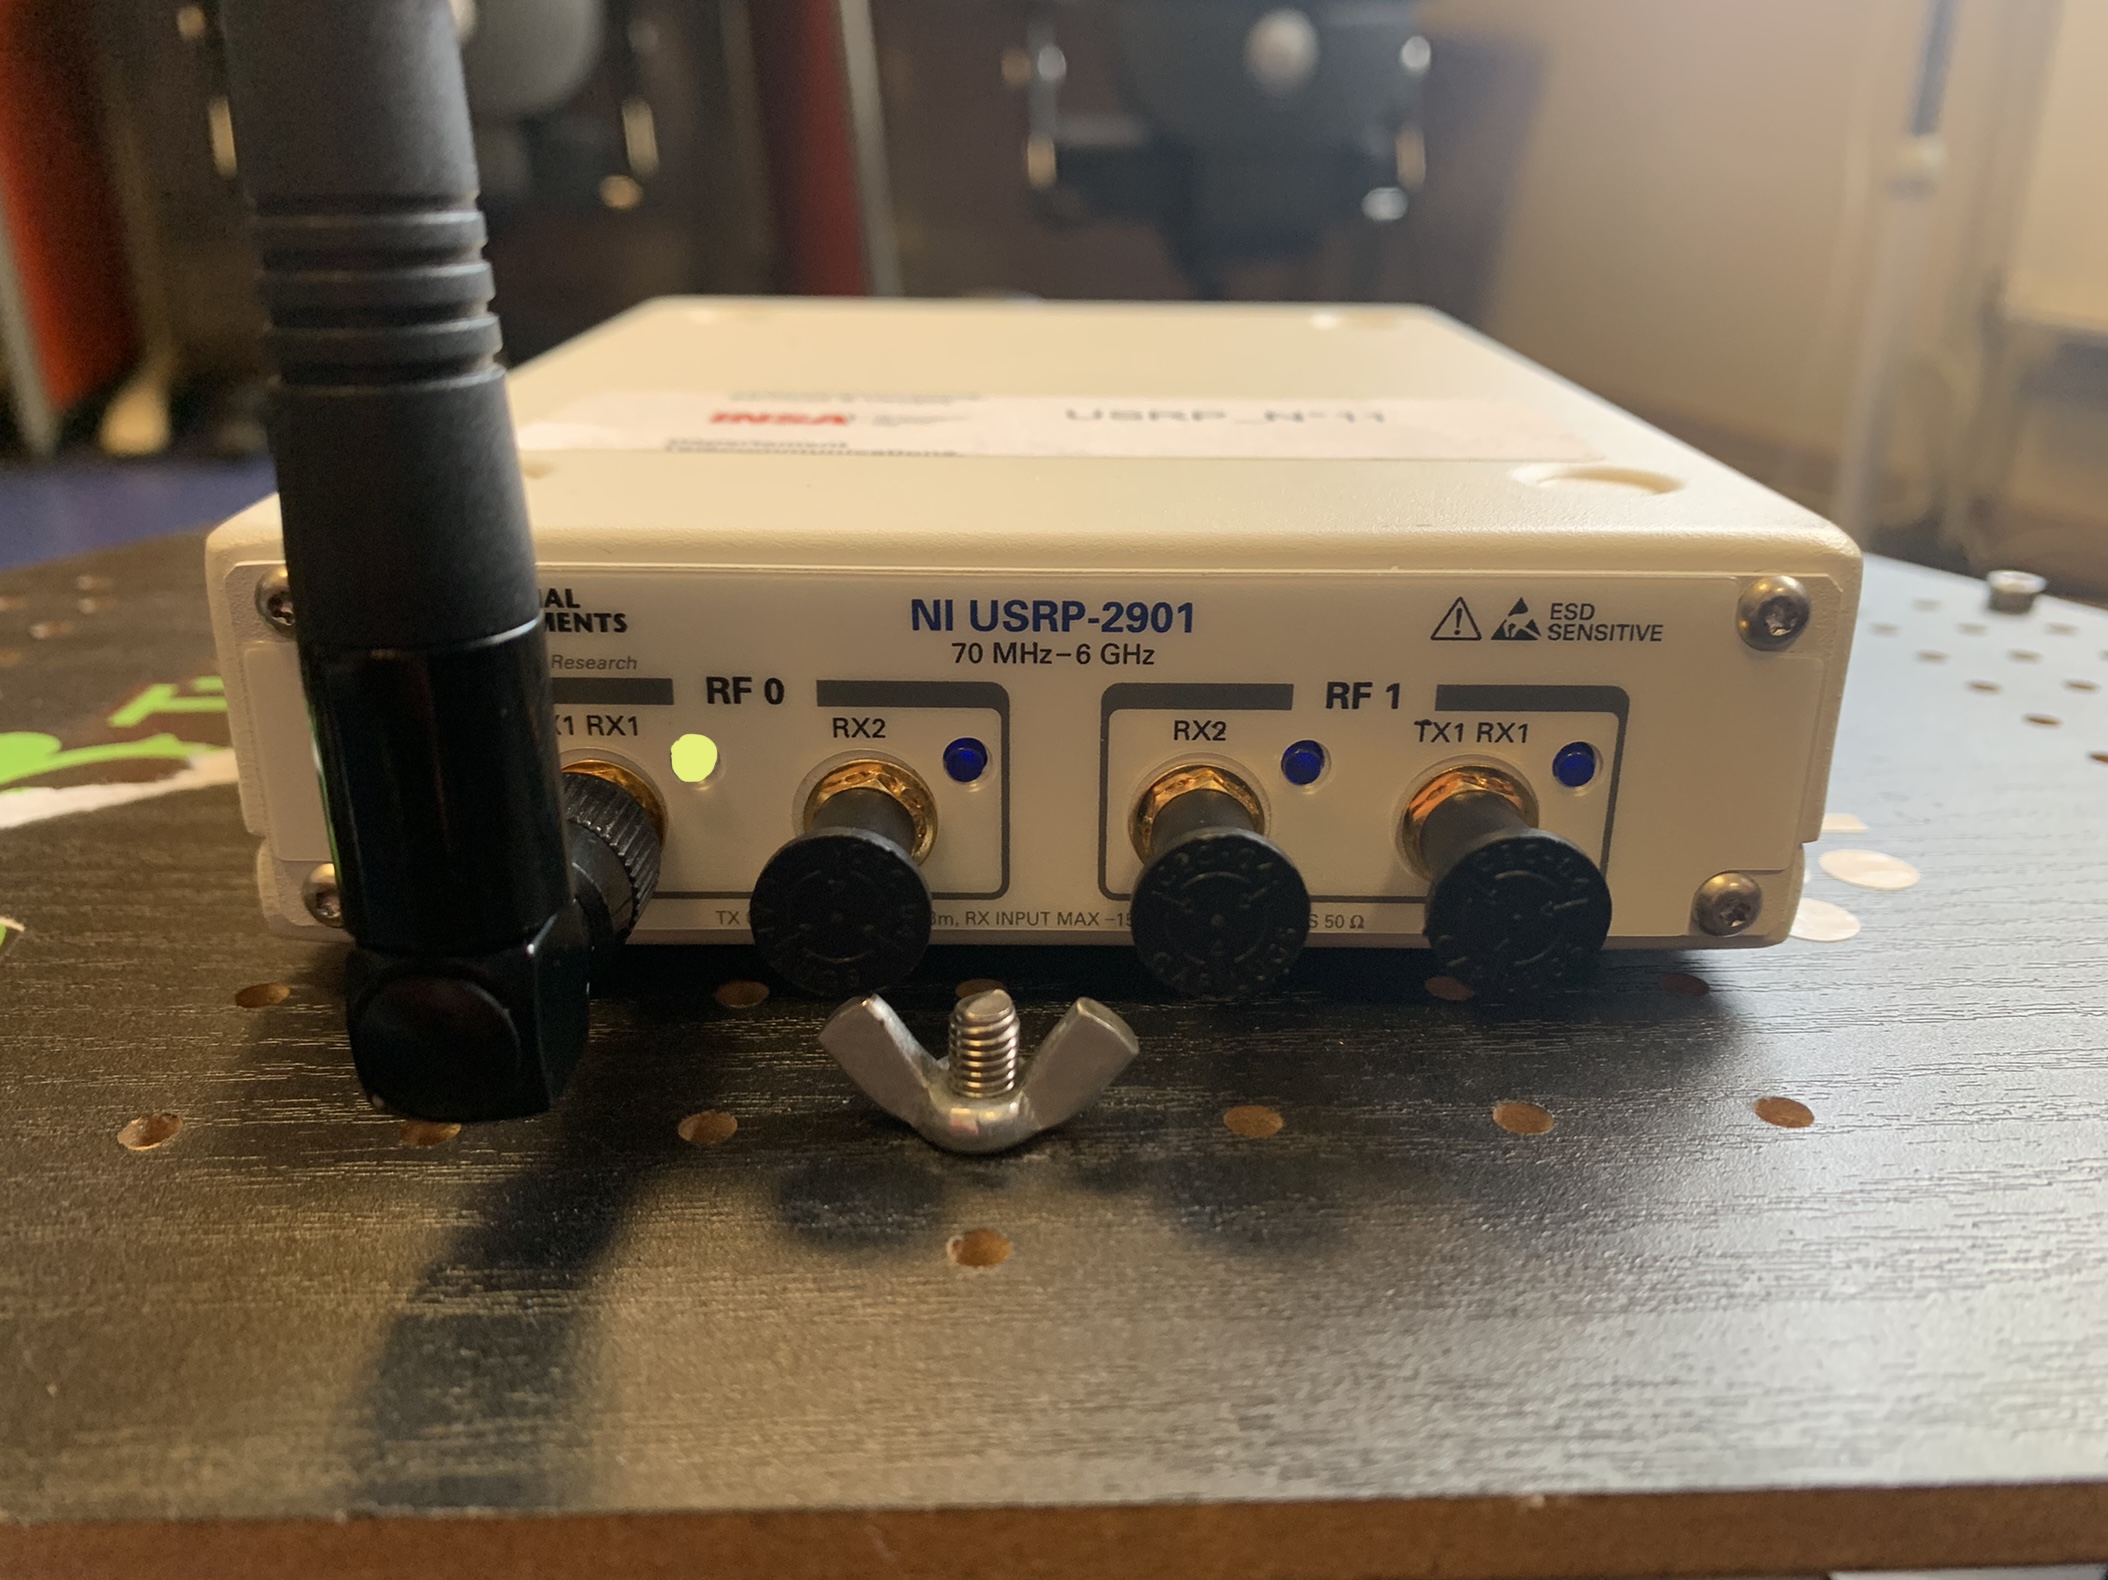
The USRP should boot and the LED of the Tx/Rx port used should light up :
The results (re00…, im00…) shall be put into the /home directory.
Open two other terminals and in one launch minimal.launch :
source ~/ROS/catkin_ws/devel/setup.bash
cd ~/ROS/catkin_ws/src/CorteXbot/launch
roslaunch minimal.launch
The Turtle bot should beep. (Ignore the error messages if the robot beeps).
In the other terminal run the random walk program : (Be sure to disconnect the HDMI cable and keyboard/mouse when pressing enter).
rosservice call /cortexbot/movement_on
Launch the experiment
The robot is moving in the Cortexlab and ready to recieve the Data. Go now on your airlock servor and launch the bash file :
username@srvairlock:~/workspace/cortexbot$ ~/workspace/experience/examples/generateData.sh
All the radios present in the scenario are succesivly sending packets to the robot. You can check that everything is fine by doing :
username@srvairlock:~$ minus testbed status
and abort the task
username@srvairlock:~$ minus task abort <id_task>
Gathering the results
To gather the results, at the end of the emissions we used a USB stick to collect the results directly from the computer of the robot. Copy and paste all the files under the format :
re_00_[number du node] and im_00_[number of node]
Congratulations, you have succesfully generated a dataset with the FIT/Cortexlab.


