Table of Contents
GNU Radio benchmark example
This tutorial executes an OFDM transmission between two nodes in CorteXlab, transmitting dummy packets between them.
We base this tutorial on the example digital OFDM benchmark transmitter and receiver code present in GNU Radio. For more info on the OFDM benchmark, please refer to the GNU Radio documentation.
Booking the platform
First we need to reserve the CorteXlab room:
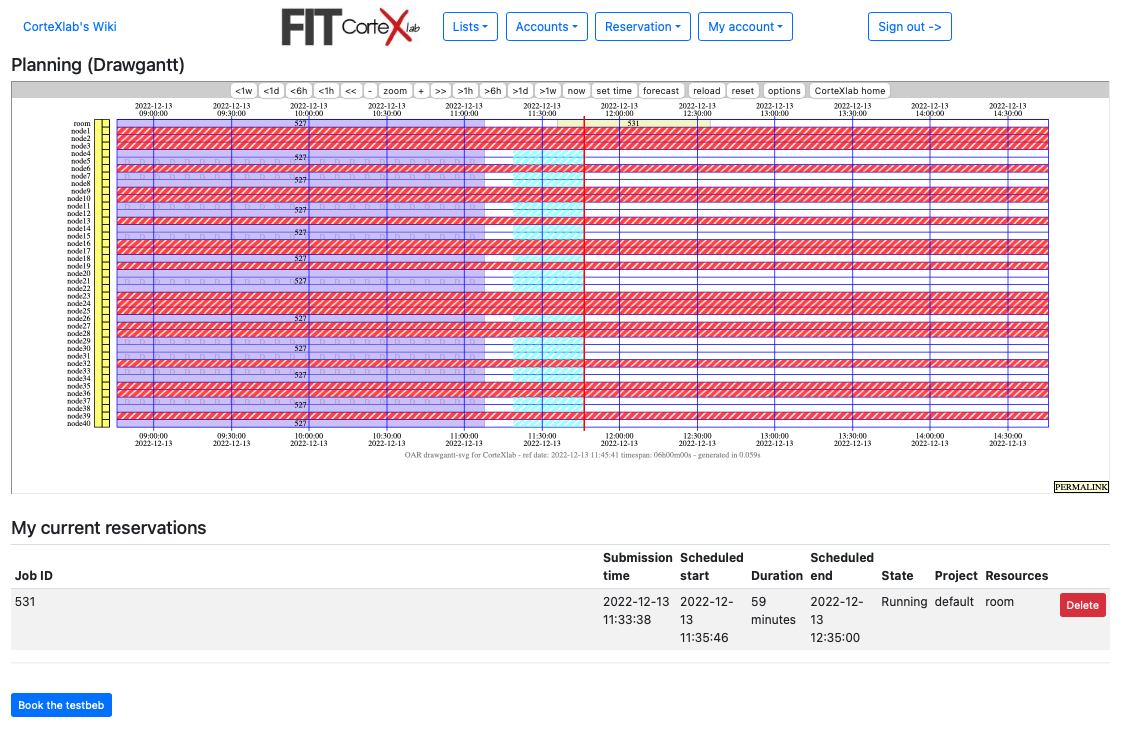
In a browser window, open the CorteXlab web app. It will show the current booking status of the platform and your current reservation list if you have any.
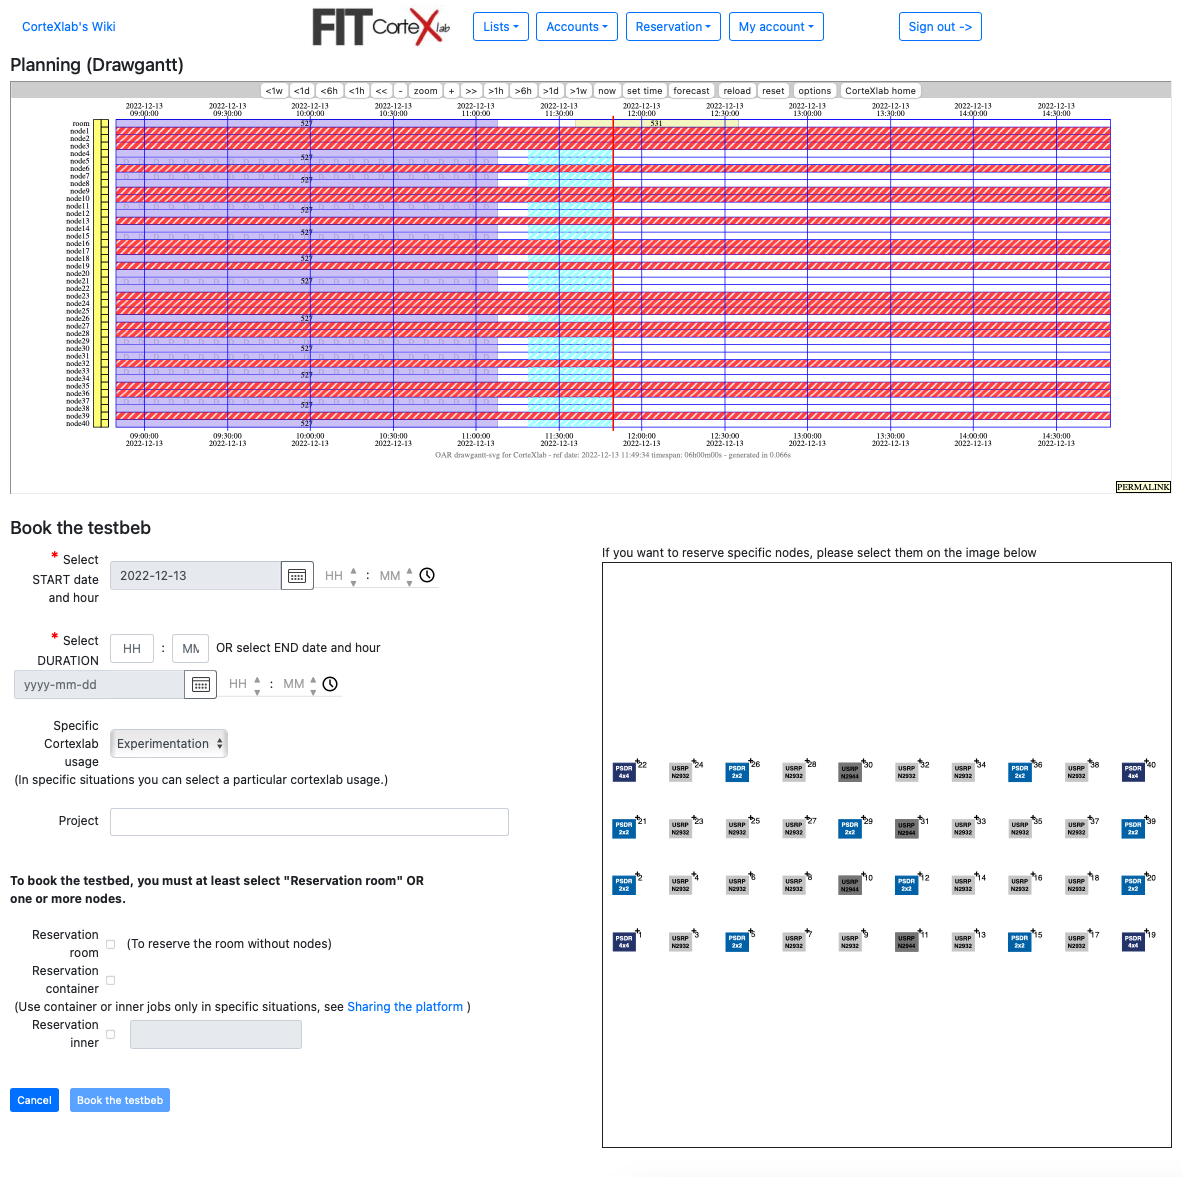
Use the “Book the testbed” button in the lower left corner.
You'll get to a screen that looks like this:
Now let's create the reservation!
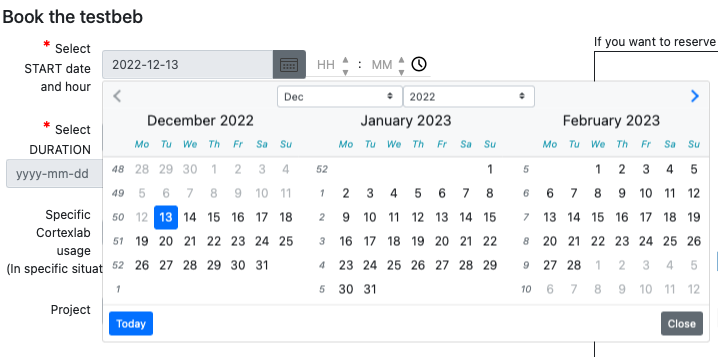
Under “Book the testbed” select the date of your reservation:
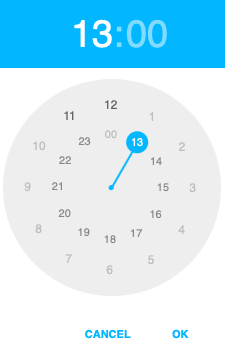
And using the clock icon select the start time of your reservation by dragging the clock pointers. Note: It is good practice to select a start time at least 5 to 10mn in the future to give more time to the computers to properly start.
 and
and 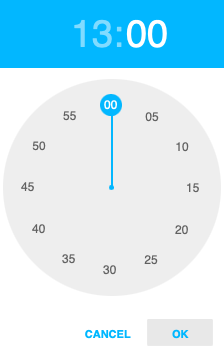
Now, in the duration, select the end of your reservation the same way as above.
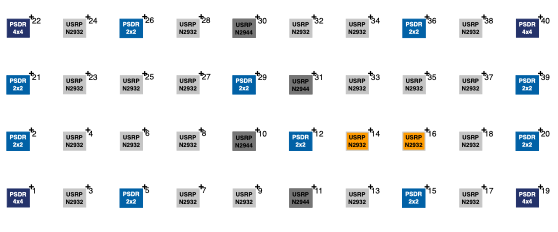
Finally select the nodes in the map of CorteXlab by clicking on the ones required for your experiment such that their color changes to orange. Since we're using 14 and 16, those are the ones to be selected:
Finally click on the “Book the testbed” button. If your reservation works (no conflicting options were chosen), you should be brought back to the reservations page, and a new line highlighted in yellow will appear with the number of your reservation.
Access Airlock
Let's access the Airlock SSH server that will allow you to manage your task. Note: You can access Airlock anytime, even without reservation.
you@yourpc:~$ ssh username@gw.cortexlab.fr
Download the experiment code
Create on your airlock home a folder called Tutorials, in it another folder called Tuto_1.
you@srvairlock:~$ mkdir Tutorials
you@srvairlock:~$ cd Tutorials
you@srvairlock:~/Tutorials mkdir Tuto_1
you@srvairlock:~/Tutorials cd Tuto_1
Now, let's get the experiment code from GitHub:
you@srvairlock:~/Tutorials/Tuto_1 git clone https://github.com/CorteXlab/examples.git
you@srvairlock:~/Tutorials/Tuto_1 ls examples
my_task  ofdm_benchmark  README.md  test_fft_web
We will be using the contents of the ofdm_benchmark folder:
you@srvairlock:~/Tutorials/Tuto_1 ls examples/ofdm_benchmark
ofdm_example_loopback.grc  ofdm_example_rx.grc  ofdm_example_tx.grc  ofdm_rx_example_embedded_packet_comp.py  ofdm_rx_example.py  ofdm_tx_example.py  scenario.yaml
Let's go over each one of the files in this ofdm_benchmark folder:
ofdm_tx_example.py: the GNU Radio python script for the OFDM transmitterofdm_rx_example.py: the GNU Radio python script for the OFDM receiverofdm_rx_example_embedded_packet_comp.py: Helper code for the receiver (code for the block computing BER)scenario.yaml: a scenario description file (in yaml format) that we will edit
The scenario
For the following, the task will refer to the instructions given by Airlock, the scenario file and minus. The experiment will refer to the OFDM transmission.
Let's open the existing scenario file using nano (or some installed text editor that you may prefer):
you@srvairlock:~/Tutorials/Tuto_1 nano examples/ofdm_benchmark/scenario.yaml
And edit the file so it looks like this :
# Example scenario description file
#
#   All lines starting with "#" and empty lines are ignored


# Scenario textual description
#   simple string (a one liner)
description: OFDM base scenario for CorteXlab

# Experiment maximum duration
#   Time after which the experiment is forced to stop
#   integer (seconds)
duration: 60

# Node list
#
#   format:
#
#   nodes:
#     (machine):
#       command: (entry point script relative to the task root)

nodes:
  node14:
    container:
    - image: ghcr.io/cortexlab/cxlb-gnuradio-3.10:1.5
      command: bash -lc "/cortexlab/homes/[username]/Tutorials/Tuto_1/ofdm_benchmark/ofdm_tx_example.py -g 15 -b 4 -r 1000000 -f 1250000000"
    passive: true

  node16:
    container:
    - image: ghcr.io/cortexlab/cxlb-gnuradio-3.10:1.5
      command: bash -lc "/cortexlab/homes/[username]/Tutorials/Tuto_1/ofdm_benchmark/ofdm_rx_example.py -g 15 -b 4 -r 1000000 -f 1250000000"
The file is self-explanatory, but for now let's ignore all but the indented lines following node14: and node16:. You'll have the opportunity to understand the rest better later on.
Let's go over each said line now:
node14:: This opens the node14 declaration of optionsimage:: This indicates which image to download and run on the node. In this case we are using one that we provide, containing a recent GNU Radio version, and the drivers required to access CorteXlab's hardware.command: bash -lc "[PATH/TO]/ofdm\_rx\_example.py -g 10 -b 4 -r 2000000 -f 1234000000": states the command to run on node14. Details of the parameters are:-g 10: This sets the receive gain of the USRP radio platform-b 4: This sets the transmission to use 16QAM modulation (4 bits per symbol)-r 2000000: this sets the bandwidth of the signal to 2 MHz-f 1234000000: this sets the carrier frequency of the signal to 1.234 GHz
passive: true: the node 14 will be passive, meaning it will stop when all active nodes are finished
This is the scenario at hand:
- Node14 will behave as the OFDM transmitter
- Node16 will behave as the OFDM receiver
For more info on where these nodes are located inside the platform, please check the node position map at the home of this wiki.
For more information on the scenario.yaml file syntax, please check the scenario_file_format page.
Once this is done, you can save the file to disk by pressing Ctrl+X to exit, followed by Y to save the current state.
Another option is to create that file on your own computer, and then copy it to Airlock with scp:
you@yourpc:~$ scp -v [-i path/to/your/key] [-r] path/to/local/file/my_task username@gw.cortexlab.fr:~/Tutorials/Tuto_1/
Creating the task file
On airlock, before submitting the task to the nodes, we need first to put the task into a format that can be readily understood by Minus. Minus is the experiment controller code, responsible for doing the dirty stuff for you:
- Firing up the right nodes to be used
- Copying the code onto the nodes
- Starting everything at the same instant
- Waiting until everything finishes, and stop stubborn code from running forever
- Copying results, error and output messages to airlock, so that you can access it
- Turning off everything and cleaning up
Let's prepare the task, but first we need to go back to the folder containing the scenario file:
you@srvairlock:~/ cd ~/Tutorials/Tuto_1/examples/
And now, instruct Minus to create a task file:
you@srvairlock:~/Tutorials/Tuto_1/examples/ minus task create ofdm_benchmark
you@srvairlock:~/Tutorials/Tuto_1/examples/ ls
ofdm_benchmark  ofdm_benchmark.task
And now we have a new file called ofdm_benchmark.task which is ready to be submitted. Warning, do not leave a slash after the directory task name (i.e. ofdm_benchmark ) or the command will fail.
Submitting the task
Now we need to give the task to Minus, so that it can operate its magic.
you@srvairlock:~/Tutorials/Tuto_1/examples/ minus task submit ofdm_benchmark.task
2540
You'll see that Minus recognizes you as the submitter of the task and gives you a task number (2540 in this example). You'll want to write down the number of the task as it will be important for checking its status or to abort it, if necessary.
Bear in mind that your task has been put on a queue and will await running tasks and other scheduled tasks to start, so it may take a while before it runs.
Minus can also help you check the status of the queue:
you@srvairlock:~/Tutorials/Tuto_1/examples/ minus testbed status
num total tasks:   2540
num tasks waiting: 0
num tasks running: 0
tasks currently running:
  (none)
These information are returned:
num total tasks: This is the number of the last created tasknum tasks waiting: This is the number of tasks currently awaiting in the queuenum tasks running: This is the number of tasks currently executing (most of the time, there can only be one task running at the same time. Only in special situations, such as demos, tutorials, can several users run tasks concurrently).tasks currently running: This is a detailed list of tasks currently running.
Collecting and analyzing the output
The OFDM example experiment should take a about a minute to run.
If you decide to directly run your experiment in the scenario.yaml, as explained before, Minus will take care of copying the results and output messages back to your home folder in airlock, so that you can analyze it.
All results are stored by task number in the results folder. Let's go and have a look at them:
you@srvairlock:~/Tutorials/Tuto_1/examples/ $ cd ~/results
you@srvairlock:~/results$ ls
task_XXXX
you@srvairlock:~/results$ cd task_XXXX
you@srvairlock:~/results/task_XXXX $ ls
node14  node16
So we see that we have a folder for each task and inside each folder one folder per participant node.
you@srvairlock:~/results/task_XXXX$ ls node14
task_XXXX_container_0               task_XXXX_container_0.create.stdout task_XXXX_container_0.kill.stdout
task_XXXX_container_0.log.stdout    task_XXXX_container_0.start.stdout  task_XXXX_container_0.wait.stdout
task_XXXX_container_0.create.stderr task_XXXX_container_0.kill.stderr   task_XXXX_container_0.log.stderr
task_XXXX_container_0.start.stderr  task_XXXX_container_0.wait.stderr
We see a series of .stdout and .stderr files. These are log files corresponding to all the steps in the life of a task:
- create: Downloading of image file
- start: Start of container
- log: Execution of the specified command inside of the container
- wait: Waiting period before closure
- kill: Task cleanup
Create, start, wait, and Kill should not have anything in their .stderr logs. The most interesting files for a user are the .log file, since they capture the execution of the user specified command, and are very useful to debug your code.
The task_XXXX_container_0 folder contains all the files that have changed during the execution of the container.
Here, it only contains internal cache and log files that are not useful to us, but if your task records data in a file, it will show up here.
In this case, the experiments only writes on the standard output so let's open the one from the receiver:
you@srvairlock:~/results/task_XXXX$ cd node16
you@srvairlock:~/results/task_XXXX/node16$ cat task_XXXX_container_0.log.stdout
You should see the following:
[INFO] [UHD] linux; GNU C++ version 12.2.0; Boost_107400; UHD_4.6.0.0-3-g080b1baa
[INFO] [USRP2] Opening a USRP2/N-Series device...
[INFO] [USRP2] Current recv frame size: 1472 bytes
[INFO] [USRP2] Current send frame size: 1472 bytes
[WARNING] [UDP] The send buffer could not be resized sufficiently.
Target sock buff size: 2500000 bytes.
Actual sock buff size: 1048576 bytes.
See the transport application notes on buffer resizing.
Please run: sudo sysctl -w net.core.wmem_max=2500000
[WARNING] [UDP] The send buffer could not be resized sufficiently.
Target sock buff size: 2500000 bytes.
Actual sock buff size: 1048576 bytes.
See the transport application notes on buffer resizing.
Please run: sudo sysctl -w net.core.wmem_max=2500000
[WARNING] [UDP] The send buffer could not be resized sufficiently.
Target sock buff size: 2500000 bytes.
Actual sock buff size: 1048576 bytes.
See the transport application notes on buffer resizing.
Please run: sudo sysctl -w net.core.wmem_max=2500000
[INFO] [MULTI_USRP]     1) catch time transition at pps edge
[INFO] [MULTI_USRP]     2) set times next pps (synchronously)
Packet Comparator0 :info: Received packet num 1 with a BER of 0.0445
Packet Comparator0 :info: Received packet num 2 with a BER of 0.0388
Packet Comparator0 :info: Received packet num 3 with a BER of 0.0357
Packet Comparator0 :info: Received packet num 4 with a BER of 0.0367
Packet Comparator0 :info: Received packet num 5 with a BER of 0.0409
Packet Comparator0 :info: Received packet num 6 with a BER of 0.0656
Packet Comparator0 :info: Received packet num 7 with a BER of 0.0596
Packet Comparator0 :info: Received packet num 8 with a BER of 0.0419
Packet Comparator0 :info: Received packet num 9 with a BER of 0.0435
Packet Comparator0 :info: Received packet num 10 with a BER of 0.0667
Packet Comparator0 :info: Received packet num 11 with a BER of 0.0375
Packet Comparator0 :info: Received packet num 12 with a BER of 0.0378

...
Let's try to understand it:
- The first 21 lines correspond to the UHD (Driver for USRP radio device) messages
- The lines starting with
Packet Comparator0 :info: Recieved packetindicate reception of a properly formatted packet. It provides two additional bits of information:- Packet number. This should increase regularly. Missing elements in the sequence indicate packet loss
- Bit Error Rate. Computed only on the current packet
What next?
Congratulations! You have finished your first tutorial on CorteXlab. Please, feel free to change the example task and try out different configurations, carrier frequencies, bands, and so on. You can always resubmit this task to test out different kinds of configurations.
One good example of what to do is to nudge the carrier frequency of approximately +/- 20 KHz and see if the decoding process works better.
To learn mode advanced concepts around creating and managing tasks on CorteXlab, please continue the tutorials.